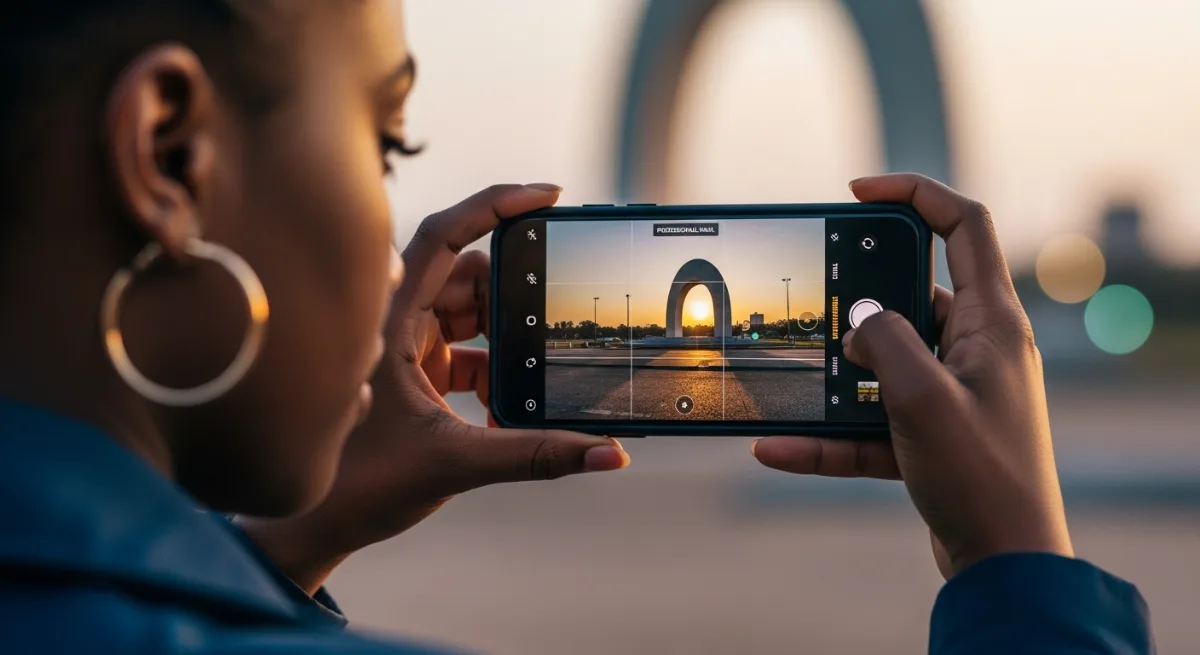
The Ultimate Guide to Phone Photography That Looks Professional
Here's something that'll mess with your head: The camera you're carrying around right now is more powerful than what professional photographers used to shoot magazine covers just a decade ago. Yet most of us are still taking photos that look like they were shot through a dirty window.
Your iPhone 15 Pro or Samsung Galaxy S24 Ultra has computational photography tech that would have seemed like pure magic in 2015. But all that horsepower means absolutely nothing if you don't know how to actually use it.
I've tested every phone camera I could get my hands on—flagships to budget phones—across different continents, and I've figured out something important: The gap between amateur snapshots and professional-looking phone photos isn't about the gear. It's about knowing five specific techniques that most people never stumble across.
Understanding Your Phone Camera Like a Pro
Why Your Phone Camera Is Actually Incredible
Your phone doesn't just snap one photo when you hit that shutter button—it fires off dozens of shots in milliseconds, then uses AI to mash them into one perfect image. This all happens behind the scenes, completely invisible to you.
The iPhone 15 Pro shoots in 48MP RAW format. The Google Pixel 8 Pro uses computational photography to create images that literally couldn't exist with old-school cameras. Even budget options like the Xiaomi Redmi Note 13 (which I see everywhere in Asia and Latin America) pack features that professional cameras charge thousands extra for.
The Fatal Mistake Everyone Makes
You're probably using your phone camera on full auto mode, letting it call every shot. That's like owning a Ferrari and never shifting out of first gear.
Your phone's default camera app prioritizes speed and simplicity—not the absolute best image quality possible. To get pro-level results, you need to grab control back.
Master the Fundamentals: Light, Composition, and Timing
How to Find Perfect Light (Even Indoors)
Light makes or breaks every single photo. Here's how I hunt for it anywhere:
Golden Hour Magic: Shoot 1 hour after sunrise or 1 hour before sunset. Your phone's camera will soak up that warm, soft light that makes everything look cinematic. I set daily reminders for my local golden hour times—honestly, it changed everything.
Window Light Technique: Position your subject near a big window, but not directly in front of it. The soft, diffused light eliminates harsh shadows and creates that coveted "natural glow" you see in pro portraits.
Overcast Day Secret: Cloudy skies work like a massive softbox. This is actually perfect lighting for portraits and outdoor shots. Never skip shooting just because the sun's hiding.
Pro tip: Download the Sun Surveyor app to track light direction and timing for any location worldwide. Professional photographers use this constantly.
The Rule of Thirds (And When to Break It)
Open your camera app and flip on the grid (Settings → Camera → Grid on iPhone, or Camera settings on Android). This creates nine equal sections.
Place interesting stuff along these grid lines or where they meet. Your eyes naturally jump to these spots, making photos instantly more engaging.
Breaking the Rule: Center your subject for dramatic, symmetrical shots. This works brilliantly for architecture, reflections, or when you want to create visual tension.
Composition Techniques That Transform Ordinary Photos
Leading Lines: Use roads, fences, shorelines, or building edges to guide the viewer's eye toward your main subject. This creates depth and pulls people into your photo.
Framing: Shoot through doorways, windows, or tree branches to create natural frames around your subject. This adds layers and makes photos feel more intentional.
Fill the Frame: Get closer than feels comfortable. Most amateur photos fail because the subject is too small and gets lost in the background.
Technical Settings That Make the Difference
Switch to Pro Mode (Here's How)
iPhone Users: Download Camera+ 2 or ProCamera. These apps unlock manual controls that Apple buries in the default camera app.
Android Users: Most phones have a "Pro" or "Manual" mode built-in. Look for the "More" section in your camera app.
Samsung Galaxy: Swipe to "Pro" mode for full control over ISO, shutter speed, and focus.
Xiaomi/Redmi: Open camera → More → Pro mode gives you DSLR-level controls.
Essential Manual Settings to Master
ISO Control: Keep this as low as possible (100-400) for crisp, noise-free images. Only bump it up in really dark conditions.
Focus Peaking: This highlights exactly what's in sharp focus. Turn it on in your pro camera app to nail focus every time, especially for close-up shots.
RAW Format: Shoot in RAW (or DNG) format for maximum editing flexibility. This captures all the data your camera sensor records, giving you professional-grade files to work with.
Pro tip: RAW files eat up storage like crazy, so make sure you have plenty of space or use cloud backup. Google Photos offers free RAW storage for Pixel users.
Understanding Exposure Like a Professional
Expose for Highlights: It's easier to brighten dark areas in editing than to recover blown-out bright spots. When in doubt, slightly underexpose your photos.
Tap to Focus and Expose: On both iPhone and Android, tap your subject to set focus and exposure. Then slide up or down to fine-tune brightness before shooting.
Use Exposure Lock: Hold your finger on the screen until you see "AE/AF Lock" (iPhone) or the focus square locks (Android). This stops your phone from changing settings between shots.
Portrait Photography That Rivals Professional Studios
Getting Sharp Focus Every Time
Single Point Focus: Switch from automatic to single-point focus mode. This lets you pick exactly what should be sharp instead of letting your phone guess.
Focus on the Eyes: Always focus on the eye closest to the camera. If both eyes aren't sharp, your portrait will look amateur no matter what else you got right.
Portrait Mode Secrets: Don't just rely on your phone's portrait mode. It's great for background blur, but manually control the blur amount using the depth slider after taking the shot.
Lighting Techniques for Stunning Portraits
Butterfly Lighting: Position your subject facing a window or light source. The light should create a small shadow under their nose—that's the "butterfly" shadow that's incredibly flattering.
Rembrandt Lighting: Have your subject turn 45 degrees away from the light source. Look for a small triangle of light on the shadowed cheek. This creates dramatic, artistic portraits.
Fill Light Trick: Use your phone's flashlight (not the camera flash) or ask someone to hold a white piece of paper to bounce light into shadows. This eliminates harsh contrasts.
Background Control Without Expensive Equipment
Depth of Field: Get as close to your subject as your camera allows while keeping them in focus. This naturally blurs the background and makes your subject pop.
Background Distance: Create more distance between your subject and the background. Even a few steps back can turn a cluttered background into a smooth blur.
Clean Backgrounds: Look for simple, uncluttered backgrounds—walls, sky, or distant areas. Your subject should be the star, not competing with busy backgrounds.
Travel and Adventure Photography Mastery
How to Capture Breathtaking Outdoor Shots
Foreground, Middle Ground, Background: Include elements at different distances to create depth. A rock in the foreground, mountains in the middle, and sky in the background creates layers that draw viewers in.
Hyperfocal Distance: Focus about 1/3 into your scene to maximize sharpness from foreground to background. Most phone cameras do this automatically in wide mode, but manual control gives better results.
Polarizing Effect: Wear polarized sunglasses and rotate them in front of your lens to reduce reflections and enhance sky contrast. It's not perfect, but it works when you're stuck without filters.
Travel Photography That Tells Stories
Local Life: Don't just photograph landmarks. I always capture people, food, daily activities, and details that show what life is actually like in each place.
Cultural Sensitivity: Always ask permission before photographing people, especially in markets, rural areas, or religious sites. A smile and gesture toward your camera usually works across language barriers.
Golden Hour Architecture: Photograph buildings and monuments during golden hour when warm light creates texture and eliminates harsh shadows that make structures look flat.
Pro tip: In countries like India, Morocco, or Mexico, early morning light (6-8 AM) often provides the clearest air quality for outdoor and city photography.
Weather Photography Opportunities
Storm Clouds: Dramatic weather creates incredible photos. Shoot during the 30 minutes before or after storms for moody, cinematic skies.
Rain Photography: Protect your phone with a clear plastic bag, leaving just the lens exposed. Rain creates reflections and adds atmosphere that's impossible to replicate.
Fog and Mist: These conditions create natural softbox lighting and add mystery to ordinary locations. Perfect for minimalist compositions.
Night Photography Without Professional Equipment
Night Mode Mastery
Stability is Everything: Use your phone's timer (3-10 seconds) to avoid camera shake. Lean against walls, use a small tripod, or rest your phone on stable surfaces.
Night Mode Tips: Most phones automatically activate night mode in low light, but you can usually adjust the exposure time. Longer exposures capture more light but require steadier hands.
Light Sources: Include light sources in your frame—street lights, neon signs, car headlights. These become beautiful focal points and help your camera focus in the dark.
Urban Night Photography
Blue Hour Magic: Shoot 30-45 minutes after sunset when the sky turns deep blue but city lights are already on. This balance between natural and artificial light is incredibly flattering.
Reflection Opportunities: Wet streets, building windows, and puddles become mirrors at night. Use them to double the visual impact of city lights.
Safety First: Be aware of your surroundings when shooting at night, especially in unfamiliar cities. Travel with others when possible and trust your instincts.
Stars and Astrophotography
Find Dark Skies: Use Light Pollution Map (lightpollutionmap.info) to find the darkest areas near you. Even a 30-minute drive from city centers makes a huge difference.
Phone Positioning: Most phones need 15-30 seconds of perfect stability for star photography. A small phone tripod (under $20) makes this possible anywhere.
Apps for Star Photography: Download PhotoPills or Star Walk 2 to find the Milky Way, plan shots, and identify constellations.
Pro tip: The Xiaomi 13 Ultra and Samsung S24 Ultra have dedicated astrophotography modes that can capture stars invisible to the naked eye.
Editing Your Photos Like a Professional
Essential Editing Apps for Every Phone
Free Options:
- Snapseed (Google): Professional-level editing completely free. Available worldwide and works offline.
- VSCO: Great filters and basic adjustments with a clean interface.
- Adobe Lightroom Mobile: Free version includes most essential tools.
Premium Choices:
- Adobe Lightroom CC: $10/month but offers desktop-quality editing on your phone.
- Darkroom (iOS): One-time purchase, incredible for iPhone users.
- RNI Films: Film emulation that actually looks realistic.
The Professional Editing Workflow
Step 1: Basic Corrections
- Straighten horizons and correct perspective
- Adjust exposure to recover highlights and shadows
- Set white balance for accurate colors
- Adjust contrast for punch without losing detail
Step 2: Color Grading
- Increase vibrance (not saturation) for natural color enhancement
- Adjust individual color channels—blues for sky, greens for foliage
- Use split toning to add warmth to highlights and coolness to shadows
Step 3: Local Adjustments
- Brighten faces and important subjects
- Darken backgrounds to make subjects pop
- Add clarity to eyes and important details
- Use graduated filters for skies
Color Grading Secrets
Film Look: Slightly lift shadows (don't let them go completely black), add a subtle orange/teal color grade, and reduce overall saturation by 10-15%.
Instagram-Ready: Increase contrast, boost vibrance, add a subtle vignette, and sharpen details. But don't overdo it—subtlety separates amateur from professional editing.
Black and White Mastery: Convert to B&W in post, not while shooting. Adjust individual color channels to control tones—darken blues for dramatic skies, lighten yellows for glowing skin.
Pro tip: Create and save your own presets for consistent editing across multiple photos. This develops your unique visual style.
Advanced Techniques for Professional Results
Focus Stacking for Ultimate Sharpness
Take multiple photos of the same subject, focusing on different areas. Apps like Helicon Focus combine them into one image that's sharp from front to back.
This technique is perfect for macro photography, product shots, and outdoor scenes where you want everything in perfect focus.
HDR Photography Done Right
Manual HDR: Take 3-5 photos at different exposures (your phone's pro mode allows this). Combine them in apps like Aurora HDR or Photomatix for natural-looking high dynamic range images.
Avoid Over-Processing: The goal is natural-looking photos with extended dynamic range, not the over-processed "HDR look" that screams amateur.
Long Exposure Effects
Moving Water: Use apps like Slow Shutter Cam to create silky water effects. Waterfalls, rivers, and ocean waves become ethereal and dreamlike.
Light Trails: Photograph car lights, star trails, or moving lights with extended exposures. Requires steady hands or a tripod, but creates images impossible with traditional photography.
Cloud Movement: 30-60 second exposures turn moving clouds into streaks across the sky, adding drama to outdoor photos.
Sharing and Showcasing Your Work
Platform-Specific Optimization
Instagram: Square crops still perform best for engagement. Use 1080x1080 pixels for maximum quality. Post during peak hours in your target audience's timezone.
Facebook: 1200x630 pixels for link previews, but native uploads can be much larger. Facebook's compression is less aggressive than Instagram's.
Print Preparation: If you're shooting in RAW and want to print, your phone photos can easily handle 8x10" prints, and often much larger depending on your phone model.
Building Your Photography Portfolio
Consistency is Key: Develop a recognizable style through consistent editing and subject choices. This builds your personal brand as a photographer.
Quality Over Quantity: Share your best 10 photos rather than 100 mediocre ones. Curate ruthlessly.
Engage with Communities: Join photography groups on Facebook, Reddit (r/mobilephotography), and local photography meetups. Learning never stops.
Copyright and Legal Considerations
Model Releases: If you're photographing people for commercial use, written permission is essential. This applies globally, though specific laws vary by country.
Property Rights: Some buildings, artworks, and private properties require permission for commercial photography. Research local laws, especially when traveling.
Watermarking: Consider subtle watermarks for photos shared online, but don't let them dominate your composition.
Troubleshooting Common Problems
Why Your Photos Look Different on Different Screens
Color Calibration: Phone screens, computer monitors, and TVs all display colors differently. Edit on the device where most people will view your photos.
Compression Issues: Instagram and Facebook compress uploaded images. Export at slightly higher contrast and sharpness to compensate for this compression.
Fixing Blurry Photos
Motion Blur: Use faster shutter speeds (1/100s or faster) for moving subjects. Your phone's sports mode does this automatically.
Camera Shake: Clean your lens, use both hands, and brace yourself against solid objects. Most blur comes from camera movement, not focus issues.
Focus Problems: Tap your subject on screen to ensure your phone focuses on the right area. Use single-point focus for precision.
Storage and Backup Solutions
Cloud Storage: Google Photos (15GB free), iCloud, or OneDrive keep your photos safe and accessible anywhere. Essential for RAW files that take up significant space.
Local Backup: Regularly transfer photos to a computer or external hard drive. Phone storage fills up quickly when shooting in RAW format.
Organization: Use descriptive filenames and create albums by date, location, or subject. You'll thank yourself later when searching for specific photos.
The Business Side: Monetizing Your Phone Photography
Stock Photography Opportunities
Shutterstock Mobile: Upload directly from your phone and earn money from downloads. Focus on common business concepts, lifestyle shots, and local culture.
Adobe Stock: High-quality phone photos can earn significant income. Travel photos from unique locations are especially valuable.
Local Opportunities: Real estate agents, small businesses, and restaurants often need affordable photography. Your phone can handle most commercial photography needs.
Social Media Growth Strategies
Hashtag Research: Use tools like Hashtagify or Later to find relevant hashtags with good engagement rates. Mix popular and niche tags.
Consistent Posting: Algorithms favor accounts that post regularly. Quality content 3-4 times per week outperforms sporadic posting.
Engagement: Respond to comments, engage with other photographers, and participate in photography challenges. Community building is essential for growth.
Pro tip: Many successful Instagram photographers started with just their phones. Consistency and unique perspective matter more than expensive equipment.
Equipment That Actually Helps
Accessories I Actually Recommend
Phone Tripod: Manfrotto PIXI or Joby GripTight series provide stability for night photography and long exposures. Essential for serious phone photography.
Lens Attachments: Moment lenses offer genuine optical improvements. Their wide-angle and macro lenses expand your creative possibilities significantly.
Lighting: A small LED panel or reflector helps with portrait photography. Neewer makes affordable options available worldwide.
Accessories to Skip
Most Lens Clip-Ons: Cheap lens attachments often reduce image quality rather than improving it. Stick to reputable brands or skip them entirely.
Phone Camera "Upgrades": Apps claiming to improve your camera hardware are usually scams. Your phone's built-in camera app is typically the best option.
Expensive Filters: While useful for DSLRs, most filter effects can be replicated in post-processing with phone photos.
Future-Proofing Your Skills
What's Coming in 2026 and Beyond
AI Integration: Phone cameras will increasingly use AI for subject recognition, optimal settings, and even composition suggestions. Understanding manual controls will become even more valuable for creative control.
Computational Photography: Multiple lens systems working together, enhanced low-light performance, and real-time editing will make phone cameras even more powerful.
8K Video: As phones add 8K video recording, extracting high-resolution stills from video will become a standard technique.
Skills That Will Always Matter
Understanding Light: No amount of technology replaces knowing how to find and use good light.
Composition: Strong composition principles remain constant regardless of camera technology advances.
Post-Processing: Editing skills become more valuable as cameras capture more data and provide greater creative flexibility.
Disclaimer: Photography success varies greatly based on effort, consistency, and market conditions. This guide provides techniques and strategies but doesn't guarantee specific results or income.
---
Your phone camera is already professional-grade—now you have the skills to match, so stop making excuses and start making art that matters.